Start Where You Are
I’m learning animation as an adult, and my first “studio” was a small table by a window; the gear wasn’t fancy, but the routine was, because a calm, repeatable space is what turns five free minutes into finished frames.
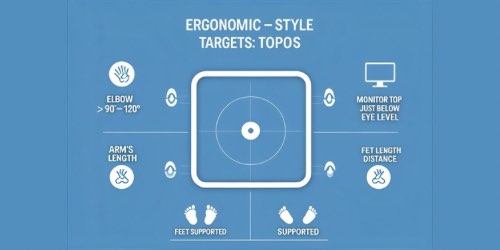
Ergonomics First (comfort = consistency)
Set your chair so feet are supported and elbows rest roughly at 90–120°, keep shoulders relaxed, and place keyboard and mouse directly in front so wrists stay straight; put your monitor at arm’s length with the top of the screen at or just below eye level so your neck stays neutral.
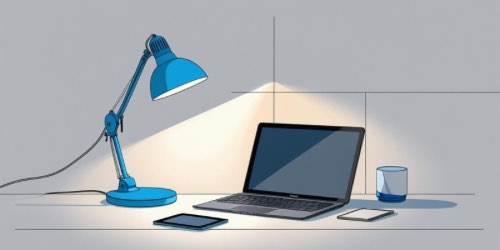
Core Setup (the minimal kit)
- Computer that runs your chosen software reliably.
- Tablet or mouse you’ll actually practice with daily.
- Headphones so timing edits aren’t drowned out by life.
- Simple task light aimed to the side to reduce glare.
- Surge-protected power strip and short, labeled cables.
The goal is a space you can reset in under a minute, because low friction keeps you practicing even on busy days.
Recommended Free Software
- Blender for 3D animation and the Grease Pencil for 2D notes.
- Krita for storyboards, background painting, and simple 2D animation.
- OpenToonz for 2D production pipelines and Xsheet timing.
- OBS Studio for quick screen captures of tests and progress reels.
Pick one tool and commit for four weeks so your muscle memory grows around a single workflow and you spend time animating, not app-hopping.
Tiny-Space Layouts (choose one)
- Window Nook: laptop or mini-PC, tablet front-and-center, lamp on the side, cable box under the desk.
- Dining Table: folding laptop stand for monitor height, roll-up mat marking “keyboard/tablet zones,” all gear in one tote.
- Stand-Friendly: monitor on arm, wireless keyboard on a tray, tablet on desk; swap sit/stand every 30–60 minutes.
Each layout keeps inputs centered and repeatable so your body remembers where everything lives and your mind focuses on motion.
30-Minute Build (from empty to ready)
- Place desk and chair, adjust height until elbows rest comfortably.
- Center monitor at arm’s length; top just below eye level.
- Align keyboard and tablet straight ahead; test wrist neutrality.
- Add lamp at ~45° to the side; kill glare and harsh shadows.
- Route power and cables; label ends; stash extras in a pouch.
Do a two-minute test: sit, breathe, open your app, and make a five-frame change; if anything fights you, adjust and try again.
Looking for tools that can make your animation learning smoother? Check this out…
Master Animation Faster with Bloop Courses

Learn the Art of Animation— Step by Step

Final Thoughts
Your workspace isn’t a destination—it’s a habit; start simple, make it comfortable, and let consistency—not gear—carry your animation forward.


