
You’re at your desk, replaying the same few frames of your animation. Something feels off—the motion stutters, the spacing shifts, and you can’t tell where it went wrong. Without the right tool, you’re stuck flipping back and forth between drawings like it’s guesswork. Projects stall, confidence dips, and progress slows when errors pile up unchecked. That missing tool is onion skinning. In this post, we’ll cover what onion skinning is, why it matters, how to use it in Krita and FlipaClip, the best software to start with, and practical tips to keep results clean. By the end, you’ll know how to save time and sharpen every frame you draw.
What Is Onion Skinning?
Onion skinning lets you view faint overlays of the frames just before and after the one you’re drawing so motion context is always visible. It’s like stacking translucent sheets on your desk: past and future guide the present so you place the in-between with confidence. Seeing where your drawing came from and where it’s headed removes guesswork from spacing.
Think about a bouncing ball. Without onion skinning, you might overshoot one frame and undershoot the next, creating a wobble. With onion skinning on, the arc appears in front of you and spacing corrections happen before the ball lands, which keeps the motion smooth and consistent.
That clarity is why animators treat onion skinning as a safety net: it aligns poses, steadies timing, and stops small mistakes from multiplying.
Why Onion Skinning Matters
Animation lives or dies on spacing and timing, and tools that reveal both keep shots on track. When spacing is visible, you can judge speed, weight, and intent at a glance instead of flipping between frames.
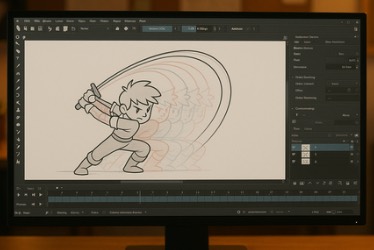
Imagine a sword swing. Without onion skinning you bounce back and forth, guessing whether the blade traveled too far or too little. With onion skinning active, the distance between drawings is obvious; you tighten or loosen spacing and the swing gains believable force.
When motion reads in overlays, workflow speeds up, consistency holds, and you spend more time improving choices than fixing avoidable errors.
How to Use Onion Skinning
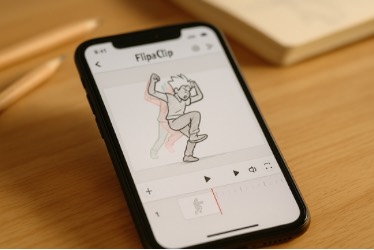
Most apps use a simple toggle to show previous and next frames with controllable opacity and count. In FlipaClip, look for the overlapping-pages icon; in Krita, enable it in the Animation Docker. Set a small range—often two frames before and after—and color-code past vs. future if available. Keep visibility high enough to guide your hand but low enough that the current drawing stays primary.
Think of it like setting guardrails. Too many frames create clutter; the right few frames give clarity without distraction so you can block, refine, and then cleanly polish.
Onion Skinning in Krita (Video)
Here is a focused demo of onion skinning inside Krita so you can see the feature at work before trying it yourself.
After watching, test a short pendulum or ball-bounce. Use onion skins to track arcs during block-in, then toggle them off for cleanup to judge the final read without overlays.
Onion Skinning in FlipaClip (Video)
If you’re on mobile or tablet, this tutorial walks through FlipaClip’s onion skins and frame controls so you can practice anywhere.
Try a simple loop—like a two-step walk or bounce—and play it back. You’ll feel how much smoother spacing becomes when you correct while you draw instead of after the fact.
Best Software for Onion Skinning
- FlipaClip — Beginner-friendly and great for mobile practice.
- Krita — Free, open-source, and customizable for deeper projects.
- Bloop Animation Courses — Training that shows onion skinning inside complete workflows.
Choosing a tool depends on whether you value mobility, customization, or structured lessons; any of these will get you moving quickly.
Tips for Getting the Most Out of Onion Skinning
Use onion skinning with intention so it clarifies, not clutters.
- Limit visible frames to avoid visual noise.
- Dial opacity so the current drawing remains primary.
- Color-code past vs. future if the software supports it.
- Toggle off during cleanup to judge line quality and final read.
These small guardrails keep the feature working for you and protect your focus when the shot gets dense.
Want to see how pro animators use tools like this to speed up their workflow?
Master Animation Faster with Bloop Courses

Learn the Art of Animation— Step by Step

Final Thoughts
Onion skinning starts as a convenience and becomes a foundation. It prevents wasted effort, catches mistakes early, and gives you control over spacing and timing. When the past and future support the present drawing, confidence replaces guesswork and your animation flows. Turn it on, practice with intention, and let clarity guide every frame.


