When Toon Boom launched Harmony back in 1994, it was a small Canadian company with a big ambition: to unify every stage of 2D animation in one tool. Three decades later, it’s the software behind Emmy-winning shows. If you’ve watched a modern 2D series, there’s a good chance Toon Boom Harmony was part of the pipeline.
Why studios rely on Harmony.
Harmony combines drawing, rigging, effects, and node-based compositing in one application, which reduces tool-switching and handoff errors while keeping scenes consistent from layout to final render. That unified workflow is why many episodic and streaming productions standardize on Harmony when they need predictable quality on tight schedules, and it’s the practical advantage that helps shows ship week after week.
Key features that set Harmony apart.
If you’re an animator stepping into a studio—or hoping to get there—what matters most is whether the tools help you work faster and stay consistent. Harmony’s features aren’t just bells and whistles; they’re designed to keep projects moving under real deadlines. Here’s what that looks like in practice:
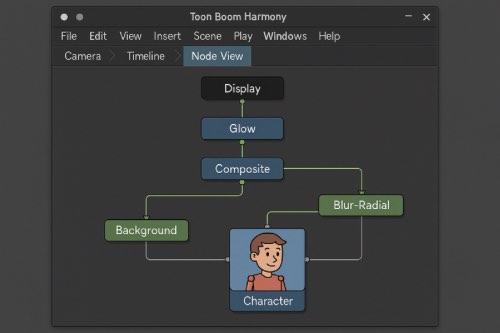
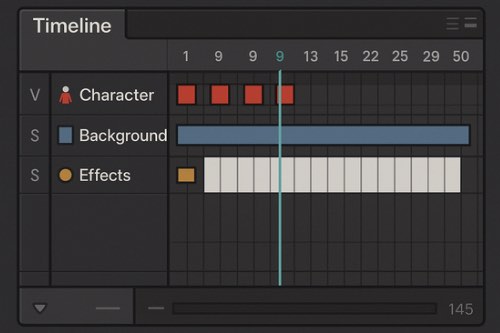
- Node View compositing: A visual graph connecting drawings, pegs, effects, and renders so complex shots stay readable and reusable across teams.
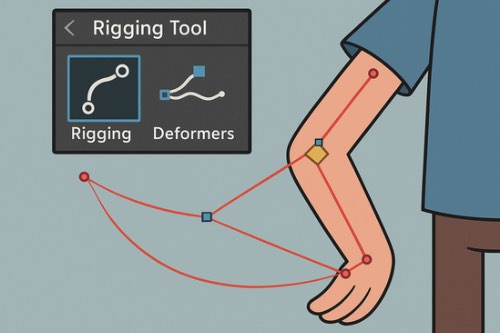
- Rigging & deformers: Bones and curve deformers for clean bends, squash-and-stretch, and expressive performance without redrawing every frame.
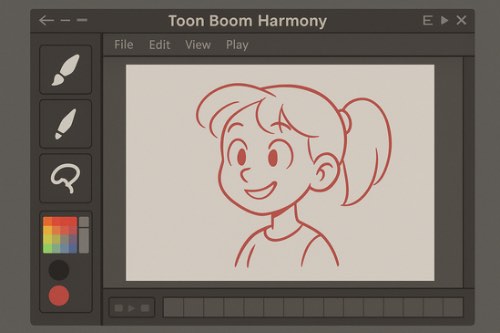
- Vector + bitmap drawing: Combine crisp vector rigs with textured bitmap looks inside a single project for both efficiency and style.
- Built-in effects (in the timeline/graph): Glows, blurs, light wraps, and color correction live directly in the timeline and Node View to keep iteration fast.
- Pipeline tiers: Essentials, Advanced, and Premium align licenses and templates with a show’s rigging and comp needs.
These are everyday, production-tested tools, which is why many studios treat Harmony as infrastructure rather than a one-off app.
Which Harmony version should you start with?
Choosing a version of Harmony isn’t just about the price tag—it’s about matching where you are in your journey. A hobbyist exploring on weekends may not need the same tools as an animator chasing a studio career. Here’s how the editions break down:
- Essentials: Good for first projects and paperless basics, but limited for full cut-out pipelines.
- Advanced: Stronger drawing and animation depth for traditional workflows, lighter on node-based tools.
- Premium: Full feature set with Node View and advanced deformers—the edition most studio pipelines standardize around.
If your long-term goal is studio-style work, plan to reach Premium skills even if you begin on a lower tier, because node-based compositing and deformation rigging are widely expected.
A practical path to learn Harmony.
Start hands-on and build in small, complete steps so features connect into a workflow instead of random menus, because finishing a mini-shot is how skills truly stick.
- Install and explore: Download the free trial and open sample scenes to study layer, peg, and node structure.
- Core tools first: Practice drawing tools, palettes, layers, timeline navigation, and playback before rigging anything.
- Rig one part: Build a single limb with pegs and a curve deformer to understand hierarchy and weighting.
- Recreate a tiny node graph: Background → character → shadow → glow, so the Node View becomes second nature.
- Finish a 3–5s shot: Take an acting or action beat from layout to render to lock in the end-to-end flow.
Once you’ve shipped one mini-shot, the next project simply layers in complexity on a process you already trust, which keeps momentum high and overwhelm low.
Recommended learning resources.
Whether you’re teaching yourself after hours, or your studio wants you to get certified, the resources you choose can make the climb much smoother. Some are free, some are structured, but together they’ll help you grow faster than trial-and-error alone:
- Toon Boom Learn Portal – Guided modules for Harmony basics, rigging, and project setup.
- Official Docs: Node View – Reference for reading and debugging compositing graphs like a pro.
- Bloop Animation – Toon Boom Harmony Course – A structured path through character animation in Harmony.
- Toon Boom Instructor-Led Training – Cohort programs and certification-oriented tracks.
Blend free modules with a structured course so you ramp quickly while producing portfolio-ready shots that mirror real studio workflows.
Download & licensing quick links.
When you’re ready to test or buy Harmony, you don’t want to waste time hunting for the right page. Here are the official links you’ll need to get started quickly and safely:
- Harmony Product Page – Overview of features and editions.
- Free Trial – Test Harmony without commitment.
- Store & Editions – Compare Essentials, Advanced, and Premium before you buy.
Keeping these links handy reduces friction when you move from testing to building a real scene, which helps you maintain momentum.
Want a guided curriculum that takes you from first project to polished portfolio pieces?
Master Animation Faster with Bloop Courses

Learn the Art of Animation— Step by Step

Final Thoughts
Harmony’s value is how it scales—from solo practice to team pipelines—so learning nodes, deformers, and in-app effects is the shortest path to studio-style work. Finish small scenes end-to-end, then layer on complexity, and your growth will compound fast. With the right sequence and a couple of focused resources, Harmony becomes less intimidating and far more empowering.


